
Part 1.Check original key’s remote and transponder
Press “Transponder Clone”.
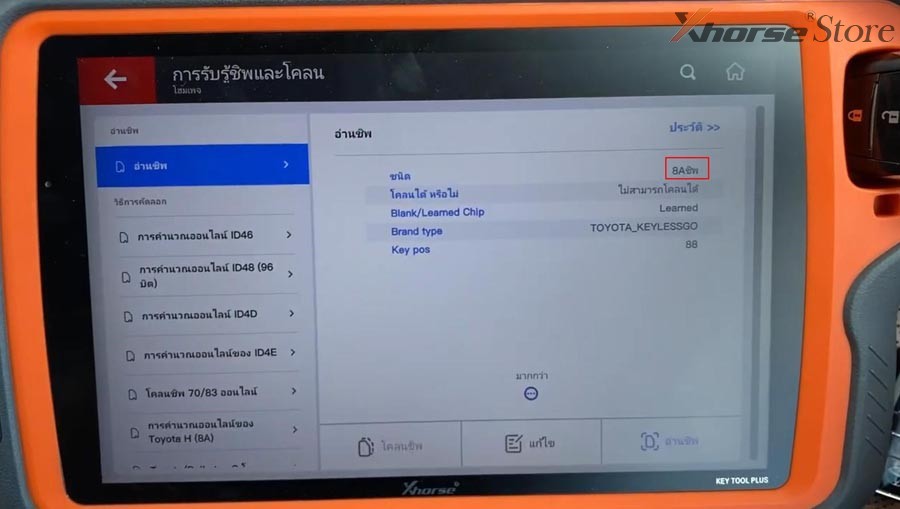
Insert the original key into the coil and press “Generate”.
Here we can see the original key is with 8A chip.
Back to Homepage
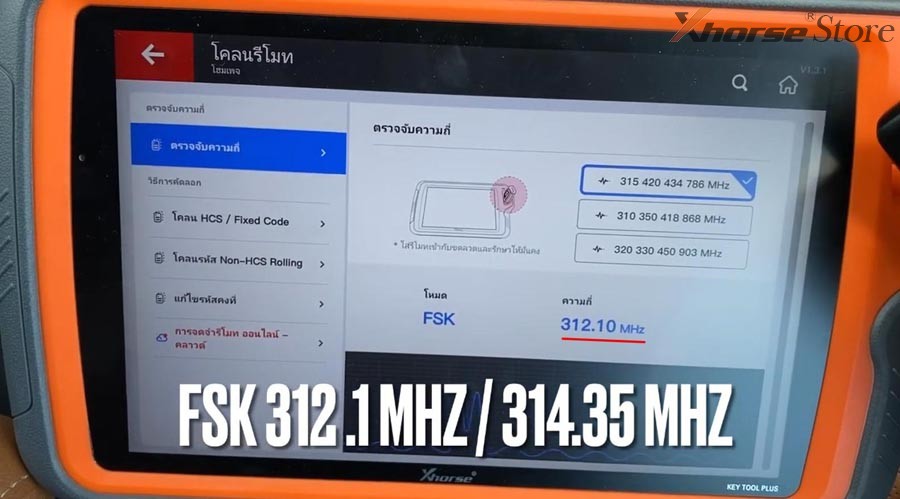
Press “Remote Clone”.
Press any key button near the sensing area to check remote frequency.
Part 2.Remote clone
Back to Homepage, press
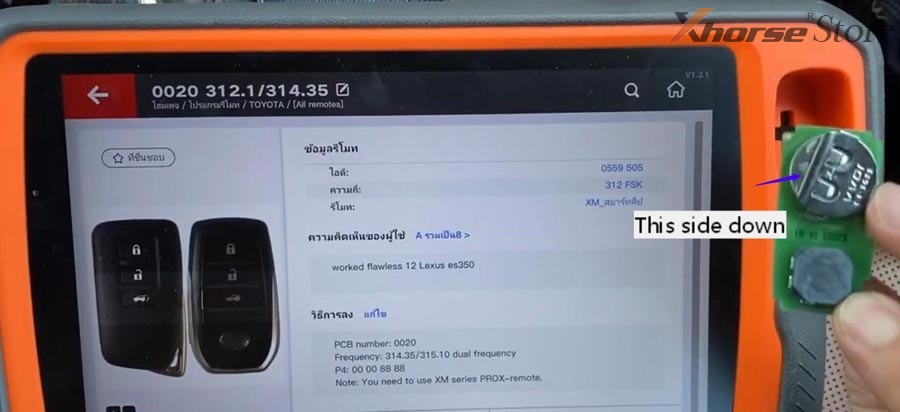
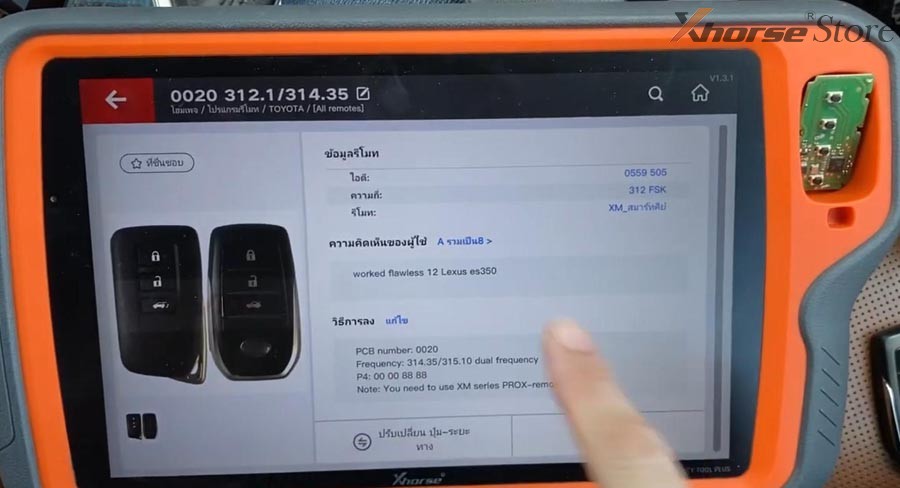
Remote Clone>>TOYOTA>>[All remotes]>>0020 312.1/314.35
Put XM-TOY00GL PCB into the coil with chip side down and press “Generate”.
Now the XM-TOY00GL PCB LED will flash.
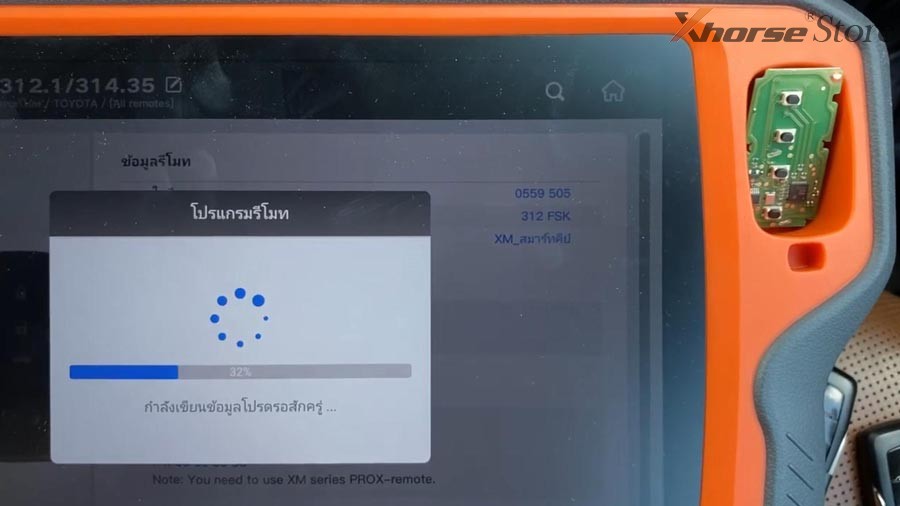
Burn success.
Part 3.Immo programming
Put XM-TOY00GL into Toyota smart shell.
Back to Homepage, press
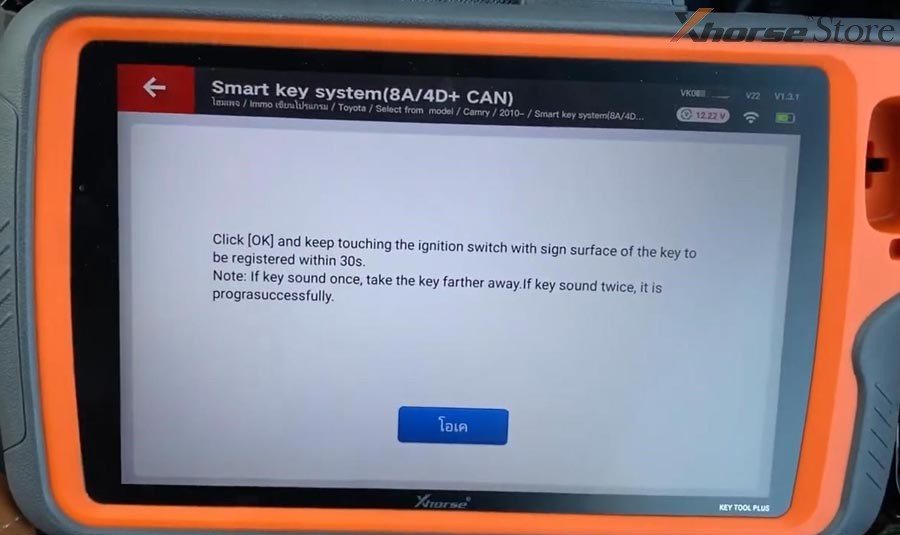
IMMO Programming>>Toyota>>Select from model>>Camry>>2010->>Smart key system(8A/4D+ CAN)>>Start Programming
Press “Read the number of keys”
Switch the ignition on.
Here shows “the number of registered key:1”.
Back to main menu of immo programming.
Press “add a key” and switch ignition on.
Here is the number of keys to be programmed.

Press “OK” and follow the prompt.


Wait and do the next prompt.
Key registration succeeded!

Press “OK” and you’ll see current key numbers.

Check if the key works normally.
This is how we generate a XM-TOY00GL PCB to add a smart key for Toyota Camry 2015 by Xhorse VVDI Key Tool Plus.
Complete!Nice and simple.